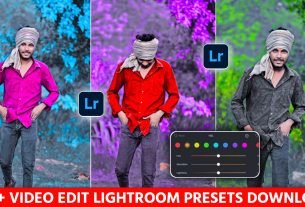
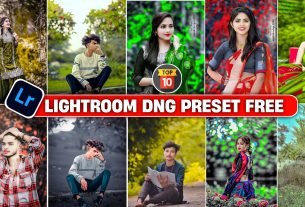
Lightroom Photo Editing Preset :- So friends, in today’s article I am going to give you the best preset for photo editing with the Lightroom app, using which you can edit your useless photos in just one click by applying this preset, due to which your photo will start looking very attractive and your photo will be edited without any hard work and people also post such photos on their social media platforms due to which their posts also go viral and people do not get the preset at all, but the preset which I will give you will be a hundred percent working preset, so you people should read this article carefully only then you will understand all the process and steps and you will be able to use this preset in a very easy way, so let us tell you people
Details Lightroom Photo Editing Preset
A Lightroom preset is basically just a saved edit. Like, when you edit a photo, you move slider brightness thoda upar, colors thoda warm, shadows kam, highlights down. Now imagine you liked that edit and you don’t want to repeat the whole thing again for every photo. So you save it. That saved file is called a preset. Next time, you tap once, and boom same look again. That’s why people love presets. It saves a lot of time and gives all photos one kind of vibe. Travel creators use warm presets, fashion people use clean or cool tones, and some just like that soft Instagram look. You don’t need to be a pro editor to use them. Even beginners can make photos look better with presets because the heavy work is already done. You can make your own preset or download someone else’s. Nothing complicated it’s just a shortcut for the style you like.

How To Using Cinematic Presets in Lightroom
Alright friends, let me explain this in the simplest way so you can edit your photos in a clean cinematic style without any confusion.
Step 1: Install the Lightroom App:- First, open the Play Store or App Store and download the Lightroom app. If you edit on a computer, don’t worry the process is almost the same there too
Step 2: Add Your Photo :- Open Lightroom → tap “Add Photo” → choose the picture you want to edit and import it into the app
Step 3: Add the Preset File:- Now import the DNG file (the preset) that I have provided. This file already has all the editing settings saved inside it.
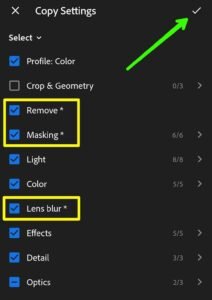
Step 4: Copy the Preset Settings:- Open the preset file → tap the three dots (⋮) in the top-right corner → choose “Copy Settings.” Then tap the ✔️ icon to confirm.
Step 5: Apply the Preset to Your Photo:-
Now open your original photo → tap the three dots (⋮) again → select Paste Settings. That’s it! The cinematic preset will be applied instantly. If you want, you can still adjust colors later to match your style.
Lightroom Effect Tool Information :-
So guys, when you do photo editing or video at lighthouse you are shown a lot of features and one of those features is also the feature of effect tools, now I will show you the effect I will tell you about the tools, what is this
Vignette – This works to increase and decrease the brightness of the edges of the photo
Clarity – By using these features or tools you can make your blurred photo into HDR or other high quality.
Grain – You must have seen in your old films that they look like grainy colours which look quite attractive. If you use the grainy tool in your photo, then your photo will also look quite attractive.
Texture – This tool is used to increase or decrease the prominence of texture in a photo, without affecting fine details.
Conclusion:-
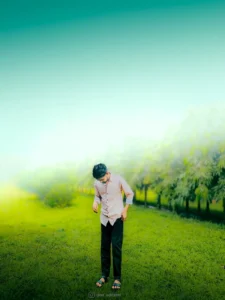
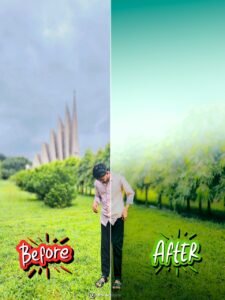
Friends, I hope you try this cinematic Lightroom preset for your photos. It is very easy to use, and your picture will look different and better than your friends’ photos. The preset gives a clean and nice cinematic look without doing much editing.if you have any problem while using it, just tell me in the comments. I will help you as soon as I can..so go ahead and use it, and enjoy your new cinematic photos!